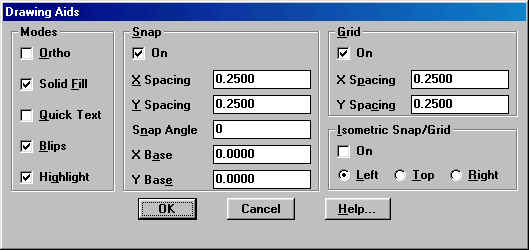

The grid will now appear on your screen and the snap allows you to
move from dot to dot drawing with accuracy. If the grid does not expand across
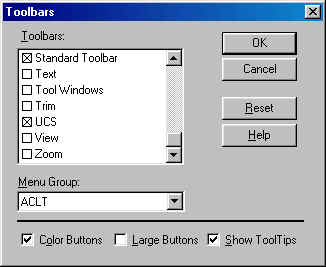
the entire drawing area then click on view and then
toolbars and scroll down to UCS. Click on the box
which will place and "X" and then "ok" as shown below. Place this toolbar on the
right side of the drawing area with the other toolbars. Click on the green icon
![]() in the UCS toolbar and then click on your screen or drawing area.
You'll now notice the entire area has the grid. Horay!
in the UCS toolbar and then click on your screen or drawing area.
You'll now notice the entire area has the grid. Horay!

Enter Zoom all at command prompt to set grid across the entire screen. Proceed now with problem 1.
Using the LINE, POLYGON, and RECTANG commands, draw the following objects. Don't worry about exact sizes, but do try to make them look as much like the ones below as possible. Practice the shortcuts and various options covered in this unit.


PRB2-1
Use the LINE, MULTIPLE, POLYGON, and RECTANG commands to create this sawhorse.


PRB2-2
Use the appropriate AutoCAD command to create the following objects.


PRB2-3
Create the object shown below by first drawing a six-sided polygon with the POLYGON command. Then draw the six-pointed star using the LINE command.

PRB2-4
Draw a block with a rectangular cavity using the RECTANG and LINE commands.

PRB2-7
The two objects shown below are composed entirely of equal-sided and equal-sized polygons with common edges surrounding a central polygon. Can this be done with equal-sided and equal-sized polygons of any number of sides? Answer this question by trying to draw such objects using the POLYGON command with polygons of five, six, seven, and eight sides.


PRB2-8
Last Updated Sept. 15/2000 ( D. Bell )