Multiview Drawings
[AQ, IL, CF, CA]
Review Questions
1. Describe the differences between "pictorial" and "orthogonal" drawings.
2. Define each of the following terms:
a) third - angle projection
b) principal view
c) hidden lines
3. Describe what is meant by the " glass box " method of projection?
4. Name the six principal planes of projection.
5. How does an engineer choose which views of projection to submit in a drawing?
6. What is the purpose of hidden lines?
7. Use the following key to indicate the number of views generally required for the product described..
Key
a) two view drawings
b) one view drawings
c) multi-view drawings
1. A symmetrical object _____
2. A conical object _____
4. A thin object _____
5. An irregular object _____
8. What four factors determine the alignment and spacing between views?
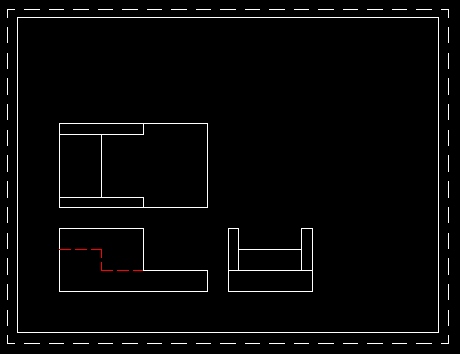
9. Study the four diagrams closely. One of these has proper spacing and the other three are incorrectly spaced. Making reference to the lettered diagrams indicate which ones are incorrectly spaced and why and which one has proper spacing.
a) 
b) 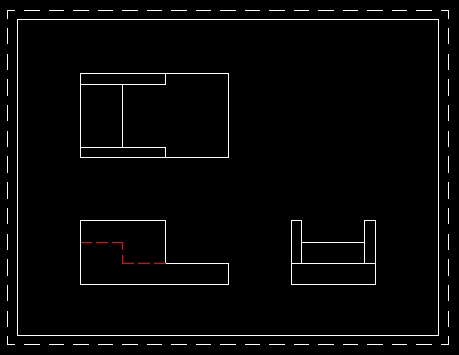
c) 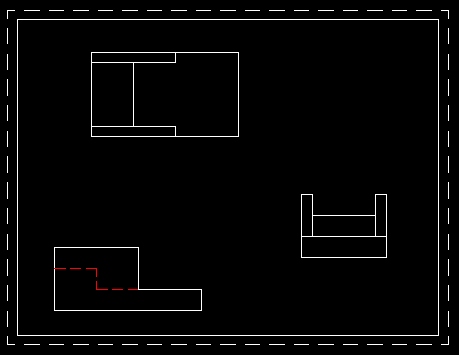
d) 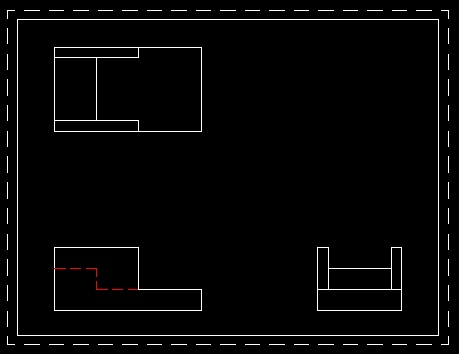
10. Desiree the steps in spacing your views.
11. How should a draftsperson determine where to place the title block?
12. Indicate the grading scheme that will be used by the instructor to evaluate you drawings for this unit.